🌐 Multiplayer (up to 2v2)
On champion select choose ⚡ Quick Match (auto-joins any open game — a waiting lobby or a running match with a free seat — or hosts one that starts vs NPC in 25s), Host Room (you get a 4-letter room code) or Join Room (enter the host's code), then pick a champion. The lobby lists everyone; the host presses START. Players can also join mid-game — they take over the AI hero with their own champion, or drop in as a 3rd/4th hero (max 2v2). When joining you choose a side: 🤝 Co-op (fight beside the host — the AI keeps the enemy hero), ⚔ Versus (enemy team), or 🎲 Any (auto-balance).
- Same network: friends just open the address shown in the lobby (http://<host-ip>:8000) in their browser.
- Signaling: uses the free PeerJS cloud by default; run start_peer_server.bat for a fully local LAN server (auto-detected).
- Economy online: each hero has their own gold purse (kills, bosses, towers); the shop deducts from it. Town halls and lane armies are shared per side; the host additionally runs the RTS economy.
- Disconnects: if a red player leaves, the AI takes their hero back over.
- 🏆 Tournaments: the host can stake the match — entry is 1 💎CT (paid joiners get a 💎 badge; unpaid players may help but earn nothing). Winners get their entry back plus 50% of the losing/forfeited fees, split. Dropping out forfeits your fee.
💎 CT (Carat) & EF HUNT — the PVE grind mode
CT is the cross-mode currency (you start with 2). Stake it in MOBA tournaments — and earn it in EF HUNT (pve.html), a separate PVE survival game in the same folder: pick from 3 daily-rotating hunters, fight scaling monster waves, tame hatchlings from eggs, gather wood/gold, build towers/walls/heal totems, survive mini-bosses every 30 minutes and slay the final boss at the 4-hour mark to clear the map. But the name carries the story's core twist — the Hunt is reversed: once Beyond the Twilight Veil carries you across the Rift into the Underworld, you are no longer the hunter but the hunted, stalked through the dark and surviving only by masking your scent. EF HUNT names the prey you become, not the prey you chase.
- Earnings: CT checkpoints at 1h / 2.5h / map-clear (20/30/50% of the difficulty payout). Difficulty 1 pays just 3 CT for the full 4 hours — difficulty 9 ("hell") pays 30.
- Permanent gear: 6 upgrade lines (attack, HP, speed, taming, harvest, pet damage), 3 tiers each, bought with CT. Gear carries over between runs — but monsters scale up with your gear score, so power has a price.
- Hardcore: die without a 🧪 revive potion (2 CT) and you lose ALL gear and difficulty progress — only your CT balance survives. Clear the map and difficulty rises +1 (max 9); the run-over screen also names the next campaign chapter you just unlocked (max Episode 7).
- Pacing: one run per 8 hours. Saving CT makes you richer; spending it makes deeper difficulties reachable. Choose wisely.
- Humanity ⇄ Corruption (story mode): in Beyond the Twilight Veil a Corruption gauge sits under your mana — but only once you've crossed the Rift. The warm human world (Episodes 1–2) is carefree: no gauge, no hunt, no survival pressure. The instant you cross into the Underworld (Episode 3) the Humanity bar appears, with a one-time warning that you are now the hunted — a new survival mode begins. From there on, casting skills (especially your ultimate) and lingering in the Underworld raise it — and the deeper the realm, the faster the dark erodes you; resting in the carnival hub lowers it. Cross the Power Threshold and your shadow power awakens — every skill hits harder the deeper the shadow runs (scaling up to +60% skill damage as you near the brink), and your ultimate also gains a haste-frenzy; max it past the Critical Limit and you are Consumed by the Veil — a death. Keep your Humanity in the light. As your Corruption climbs, the 🕷 Whisper (the dark's own voice) murmurs a taunt at each new depth you reach — flavour that marks how far you've slipped; your 📜 Journal keeps a 🕷 The Whisper record of how many of its depths you've heard this descent and its last words to you. Choice moments: once per run, as each chapter begins, the story pauses to offer a dark/light choice — the dark option buys power but feeds the Veil (raises Corruption), the light option holds to your humanity (lowers it). Your pick flavours the next line of dialogue and nudges your gauge, so every descent is a fresh negotiation with yourself. Your choices this run are tallied into 🌗 Your Path in the 📜 Journal — and, once you've made your first choice, surfaced live in the top-bar status indicator (🌑 shadow-leaning, 🕯 light-leaning, ☯ balanced) so you can read your drift mid-run — lean dark and you read as Shadow-Touched or Veil-Bound, hold to the light and you stay Pure of Heart; the tally resets each run. And at the very end, your path is spoken to: when you clear the final boss, the ending closes with one extra narrator line keyed to the choices you made this descent — the Veil knowing your name all along if you went dark, or finding nothing it could take if you held to the light.
- 🍞 Anchors of Humanity (human food): the carnival hub is your safest balm, but once you're deep in the Underworld (Episode 3+) relief is scattered on the ground — loaves of human food, each lit by a soft warm glow. Walk over one to eat it and pull your Corruption gauge back toward Humanity. Unlike gold and gear, food is not drawn to you — you must go to it, so each loaf pings the minimap as a warm-amber ✚ (it always shows, even through unexplored fog) — a low-Humanity hunter can always see where relief is. This is Yume's Episode-6 bargain made real: eating masks your scent for a breath — the Underworld's hunters lose track of you and break off the chase, a brief respite in the deep. A 🍞 MASKED countdown appears in the top-bar status indicator while it lasts, so you know how long the window is open. It won't fool a boss, and any creature you've already struck stays on you; when the scent returns the hunt resumes. (Food appears only in the Underworld, and not at all while you are Consumed by the Veil.)
- Chapters & cutscenes: the campaign runs across seven episodes (📖 Chapters on the title screen), each opening with a first-person story cutscene. Episode 2 "Masquerade" introduces the fox-masked Yui; Episode 3 "The Rite of Blades" is the blood-pact at the portal, where the living Blood Scimitar brands you — your first shadow power awakens and, ever after, every run begins with a faint corruption residue. From the Rift down, the descent crosses the three Realms of Desire that re-frame the Underworld zones — the Luring Garden (Ep4 — desire as the wonder that wants to keep you), the Hungering Dance (Ep5 — desire as consumption, the crowd that eats you alive) and the Hollow Wastes (Ep6 — desire as the price come due). Episode 4 "Garden of Whispers" shrinks you into a dream-garden where the river of visions shows a chilling foreshadow of the betrayal to come. Episode 5 "Dance Macabre" turns a beautiful dance into the Ballroom of Nightmares: light the colour-hungry blooms to open a path while a dancer-swarm hunts you, and watch the dark drag Ayume down toward the throne — a "capture" that may not be one. Episode 6 "Shadows of the Self" strands you in the Hollow Wastes, where the human girl Yume gives you a compass to the Castle of Shadows and human bread: eat human food to pull your Corruption back toward Humanity and, for a breath, mask your scent so the hunt loses you — though the quiet is brief, no Warden is fooled, and leaning back toward your humanity dims the shadow-power the Veil lends: power or peace, never both. Episode 7 "Kage no Mamoru" storms the Castle of Shadows (Yomi no Tō): a boss gauntlet against the shadow-lord Kage no Mamoru, where the Corruption gauge becomes the whole fight — stay below the Power Threshold and your blade barely scratches him as he mends in the dark, so you must embrace the shadow to wound him, yet cross the Critical Limit and the Veil consumes you mid-fight. The throne waits one door beyond. Every cutscene is voiced — each speaker has their own tonal bark as they talk (bright for Yui, low and grinding for Kage no Mamoru, an eager woof for Barkindle), with soft stings as a scene opens and closes and a dark/light chime when you take a choice. The story's pivotal beats — the 🕷 Whisper reaching a new Corruption depth, the instant Ayume reveals herself, and the alignment line that closes your ending — land on a deeper reveal sting, a low dread-stab that tells your ear something just turned — paired with a blood-red flash across the screen and a shudder of the dialogue box, so the moment still lands with the sound off. Cutscenes play from the keyboard too: Space or Enter advances a line, Esc skips the scene, and when a dark/light choice is on screen 1 takes the darker option and 2 the lighter — so the whole campaign is replayable without the mouse. So the controls are never a secret, a small hint line under every dialogue box spells them out (▶ click / Space · Esc ⏭), and the dark/light choice buttons are numbered 1./2. to match their keys. Replaying a chapter you've already watched? A ⏭ skip tab on every dialogue box (or Esc) jumps to the end of the scene (it still hands off to whatever the scene was about to do) — but it always stops at a dark/light choice, so your path is never skipped for you. The 🔊 toggle mutes the audio.
- The betrayal & the true final boss: felling Kage no Mamoru does not end the story — it opens the throne. Ayume orchestrated the whole descent: she found The Scimitar's Secrets and needed a fated partner to carry the blade and ripen on the way down. At the throne she absorbs Yui into the onyx stone and becomes the true final boss — Ayume herself. Defeat her and your ending is chosen by the difficulty you cleared (1 = the bleakest, 9 = the Holy Grail, the only ending where Yui is redeemed — clearing it plays the full epilogue in the moment you earn it, and the ▶ Memories viewer replays it after). Clear a chapter to unlock the next. Your 📜 Journal tracks an 🎭 Endings Witnessed roll (n / 9) — every ending you've reached and your furthest clear, each remembered with a one-line first-person echo of how it ended for you (sealed rungs stay spoiler-free) — so you can see which rungs of the difficulty ladder are still left to earn.
- 📖 The Story So Far (in-run chapter recap): once you're in a hunt the chapter objective is easy to forget — so your 📜 Journal now opens with The Story So Far: the episode you're playing, its setting and your party's stance, your 🎯 objective for this descent, and a ladder of all seven chapters marking which you've cleared (✔), where you are (▸) and what's still sealed (🔒). And the moment a descent begins — once the opening cutscene and your dark/light choice are past — that 🎯 objective also flashes up as an on-screen banner, so you're reminded what you came to do.
- 📜 Memories of the Veil (lore codex): living the story reclaims lost memories into your 📜 Journal — one for each chapter you play (the carnival night, the fox in the grove, the living scimitar, the river of visions, the staged scream, Yume's warning, the onyx throne), plus two hidden OVA fragments: 📖 The Bookshop (Ayume's origin) is recovered when the throne opens at the betrayal, and ✒ The First Page (the truth) is recovered on a difficulty-6 clear — the same moment the ▶ Memories OVA viewer unlocks on the title (your first difficulty-6 clear also pays a one-time 💎 +2 CT for unsealing the truth). Collect all nine to complete the record. The memories are pure lore (no combat effect) and survive death like your story progress.
- Barkindle (your starter pet) is never lost for good: if your faithful companion Barkindle falls in the Underworld, he isn't gone — return to Emberhollow and press B near the Kennel (the doghouse, with its food bowl) to revive him for gold. The cost rises with your difficulty, and he comes back at full strength (scaled to your difficulty, level and Taming tier). Pet death never feels permanent for the signature companion. And in a boss fight your pets can't read the red-ring slam telegraph the way you can, so a slam catches them — but they take only half its damage (you take it full), enough to keep the pack alive at your side for a hit or two instead of being wiped every cast.
- Commanding a pet (MOBA-style): pets fight and gather on their own — and when no enemy is right beside a pet, it now piles onto whatever you're attacking rather than standing idle, so the pack fights alongside you and helps run down the ranged stragglers that try to kite you in the deeper realms. You can also give one a direct order — left-click a pet to select it (a blue ring appears), then right-click an enemy to send it to attack, right-click the ground to move it, or press S to stop / H to hold position. It's a single order: after one command, control returns to your hero automatically and the pet carries out the order before resuming its own behaviour.
- Companions: Ayume and Yui stand beside you as party members — Ayume accompanies you through the monster-free Carnival, and Yui joins as an allied unit who hunts monsters with you once the descent begins (from the Garden of Whispers onward). Each appears in their true form — Ayume wears Leah's model, Yui wears Irene's. They are loyal… for now. Late in the tale a companion can turn against you, joining the enemy and hunting you instead — the gentlest face among them was the Veil's own.
- The four Sin-Realms & their Realm-lords: beyond the carnival the Veil is sculpted from human desire into four named realms, each a 🗺 zone with its own boss. Together these four are the second of the three Realms of Desire — the Hungering Dance: desire as consumption, the crowd that eats you alive. Valley of Midas (Greed) — streets of living gold where the covetous gild themselves solid — ruled by Aurelian, the Gilded King, who rains molten gold and ENRAGES at low HP. Feastfall (Gluttony) — an endless banquet under hunger-storms — ruled by Throngullet, the Endless Maw, who chills you and looses ice shards. Isle of Dominus (Power) — fortresses adrift in static air — ruled by Vael, the Crowned Tyrant, who strikes from the spire and chains lightning to your pets. Enamora (Lust) — a garden of perpetual twilight, sweet with rot — ruled by Seraphel, the Beguiling Rose, who rends the earth with grasping thorns. Beyond them all stands the Castle of Shadows (Yomi no Tō). Realms open one at a time, in order: fell a realm's Warden and its key unseals the next, so a far chapter (e.g. the Ep7 Castle / Abyssal Vault) stays locked until you've cleared the realms before it — and if you pick a still-sealed realm the game drops you back in the Wilds and tells you the exact Warden and realm to clear next. Each realm's lore reads on the 🗺 Choose Zone screen, where the one realm you can open right now is flagged ▶ NEXT (amber) with the Warden and open realm that unseal it. The screen now reads as a climb at a glance: realms you've cleared show ✔ (green — Warden felled, key taken), your current rung shows ◆ Frontier (fell its Warden to unseal the next), the openable one shows ▶ NEXT, and the rest stay 🔒 sealed.
- The Fortune Teller (carnival oracle): a striped fortune tent stands in the carnival hub — left-click the Fortune Teller to read your cards. Your first reading is a full prophecy that warns of the allure of power (the Corruption gauge) and quietly seeds the betrayal — including a third card she covers before you can see it. Return any time for a fresh single-line omen hinting at the systems and story ahead: rest in the light to heal Corruption, the fox at the masquerade, the branding blade, the door that opens but one way into the descent, the dark below that runs the hunt backward (cross over and you become the hunted), human bread to mask your scent in the deep, the throne someone you trust already knows the way to, and the grey middle land that opens only once the worlds run both ways.
- Fog of war (exploring): every hunt the world starts shrouded. The minimap and the 🗺 world map (M) reveal only the ground you've actually walked — a lit bubble follows you and leaves an explored trail. Resource nodes, dropped loot and lurking enemies stay hidden in the fog until you reach their part of the map, rewarding players who roam the far edges. The fog clears and resets with each new run.
- Objective compass (🧭): a gold needle on the minimap always points toward the current chapter's goal — Yume's enchanted compass (Ep6), generalised to every episode. Ep1 points home to the carnival; later chapters point to that chapter's realm; Ep7 holds dead-steady on the Castle of Shadows. The needle rests once you reach the destination zone.
- Reading the enemy (threat markers): a coloured con marker floats over every monster — green easy, white even, orange ! tough, red ☠ deadly, ??? flee — so you can size up the danger before you commit. A small ⚠ THREAT legend sits just above the minimap (bottom-right), keeping the colour scale on screen at all times. Monsters also have moods: most chase, a few ignore you until struck, some hound you back to town, clever ones break off when losing.
- World pickups (finds on the road): each hunt scatters generous finds across the Wilds — gold piles, wood bundles and dropped gear — every one tagged with a faint golden glint visible from afar. Approach a find and it is vacuumed straight to you (no clicking). The best caches, and double-value gold, lie out on the far edges of the map, so roaming pays — but the roaming packs you meet there hit harder and soak more the further you stray from Emberhollow (gentle by the town, up to ~50% tougher at the rim), so the richest ground is also the most dangerous.
- Hidden caches (gated corners): three treasure caches are sealed in the hardest-to-reach spots each hunt — atop the two high mesa crowns (the slow climb gates them) and on a far map edge — each marked by a tall amber pillar of light. A cache is not vacuumed; you must climb or trek all the way to it. Opening one yields a guaranteed Rare-or-better weapon/armor, bonus gold and a gem — the payoff for reaching the edges. Rare reclaims now carry their own sound: a triumphant chime for a cracked cache, a warm tone for a human-food anchor, and an ethereal note when a memory is recovered (🔊 toggles audio).
- The Veil's Edge (the world's border): the Wilds do not stop at an invisible wall. Walk to the far brink and the carnival's land frays into the Twilight Veil — a glowing violet seam marks the edge, mist rises off it, and just beyond, the ground breaks away into a starlit abyss where distant Veil-shards of lost places drift, forever out of reach. This is the canon membrane between the human world and the Underworld; no road crosses it on foot — only the Rift's portals pierce it. And at first the Rift opens one way only: cross it at the Rite of Blades (Ep3) and the dusk seals behind you — the descent is one-way, no road back, until deep at the bottom you reach the one road home and earn it; from then the Veil runs both directions, and the dusk-lit human world, the grey middle land between, and the Underworld all lie open to cross at will. Walk up to the brink and left-click the 🌌 Veil's Edge marker to read its lore.
- The Riftgate (the threshold to the Underworld): in a clearing in the north-east plains the human world tears open — a torn violet seam hangs in the air between two leaning monoliths (the Guarded Portal), over a dark ritual dais ringed with glowing sigil-cracks and a black descent throat. On a blood-altar at its foot stands the Blood Scimitar, the blade you take up at the Rite of Blades (Ep3). This is the Rift the realms below all hang beneath — Mossfang, the Hollow Court, every rung of the Hunt that hunts YOU — made into a real place at last. Step through and the Rift seals behind you, no door: the descent is one-way, the dark opening only downward, until far at the bottom you earn the road home. Left-click the 🩸 Riftgate marker to read its lore.
- The Wayfarer's Road (the way out of town): Emberhollow no longer empties straight onto an open field. A worn flagstone road leads north out of the town gate — under a timber trailhead arch, past a line of glowing carnival lampposts, between a tree corridor that thickens as you go, drawing you forward like a classic-RPG opening. Halfway sits a 🪧 Wayfarer's Milestone; where the lamplight gives out stands the 🗺 Frontier Waystone, marking where the road ends and the open Wilds begin. Left-click either marker for its lore. It costs you nothing to leave the road — it's a guide, not a wall — but it gives the early game a single, contained route out, the way the wider world will open one stage at a time as your story advances.
- The Highcrag Stair (the climb to the high crags): the world isn't flat — it rises in three height levels: the LOW moonlit plains, the MID shelves, and the HIGH crags. On the east face of the Highcrag (north-west of town) a worn switchback stone stairway now zig-zags up the slope — out of the plains, across the shelf, all the way to the HIGH crown where a 🏹 Hunter's Overlook keeps its watch — so the climb to the heights reads as a real ascent instead of a nameless slope. Rail posts line the outer edge, landing pads mark the switchback turns, a waymark cairn sits at the foot and a banner at the top. It costs nothing to use (the steps just hug the hillside — a guide, like the Wayfarer's Road), but it makes the high ground feel earned. Left-click the 🪜 Highcrag Stair marker at the foot for its lore.
- The Emberwood Ascent (the climb to the second overlook): the far (south-east) corner of the map has its own HIGH crown — the Emberwood crown — and until now it kept its second 🏹 Hunter's Overlook with no way up. Now a graded switchback trail of packed earth and timber wears its way up the crown's south-west face — out of the LOW moonlit plains, through the MID rim of rust-leaved trees, all the way to the HIGH crown where the Overlook keeps its watch. Where the Highcrag Stair (north-west) cut stone steps, this is a forest path: timber rail posts on the downhill edge, landing pads at the switchback turns, a trail signpost at the foot and an autumn-rust banner at the top. It costs nothing to use (the treads just hug the hillside — a guide, like the Highcrag Stair and the Wayfarer's Road), but now both high crowns are reached by a deliberate climb, so the world's three height levels read all across the map. Left-click the 🥾 Emberwood Ascent marker at the foot for its lore.
- The Emberwood Rise Path (the climb that lifts you one rung): not every climb ends at a crown. The world's three height levels aren't only LOW plains and HIGH crags — there are MID shelves in between, and until now you could only reach them by sliding up a nameless slope. On the south-east face of the Emberwood rise (south-east of town) a graded switchback trail of packed earth and timber now climbs out of the LOW moonlit plains up onto the MID rust-wooded shelf — the rise that the Emberwood Scarp walls on its south-west and the Emberwood Mistfall spills off to the north-east, but which had no way up. Where the Highcrag Stair and Emberwood Ascent haul you all the way to a HIGH overlook, this one lifts you only one rung, to the wooded flats — so the middle tier now reads as a place you deliberately climb to, not just terrain you drift over. Timber rail posts on the downhill edge, landing pads at the turns, a signpost at the foot and an autumn-rust banner at the top. It costs nothing to use (the treads just hug the hillside — a guide, like the Emberwood Ascent). Left-click the 🍂 Emberwood Rise Path marker at the foot for its lore.
- The Cragfall (water off the high shelf): on the north flank of the Highcrag the high ground sheds its meltwater — a waterfall leaps off the cliff lip of the HIGH shelf and crashes down the wet-rock scarp to a plunge pool on the LOW plains below, throwing up spray as it lands. Unlike the older Mistfalls (which sit on flat ground), this one is anchored to the real hillside: it pours genuinely from a higher level to a lower one, the way water actually runs — so the world's three height levels read as a true landscape, not props on a plane. It costs nothing and blocks nothing; it's a landmark, not a barrier. Left-click the 💧 Cragfall marker at the pool for its lore — and remember, water seeks the low ground: trace a falls downhill and it'll lead you off the crags.
- The Highcrag Scarp (where the crag breaks off): on the south rim of the Highcrag the high ground doesn't just slope away — it shears off in a cliff. A band of sheer rock faces now runs along the rim where the HIGH crag crown steps a full level down onto the MID lower shelf: a stone lip you can stand on at the top, the rough cliff face dropping below it, and fallen talus boulders piled at its foot — so the boundary between two height levels reads as a real shelf edge, not a smooth ramp. Stand on the lip and you command the whole shelf below; the only easy way between the two levels is the Highcrag Stair to the east. It costs nothing and blocks nothing — the rock just dresses the hillside the hero already walks. Left-click the 🪨 Highcrag Scarp marker at the foot for its lore.
- The Emberwood Scarp (where the rust-wood breaks off): the far south-east has its own cliff now. On the south-west face of the Emberwood rise, the MID rust-wooded flat doesn't slope gently away — it shears off and steps a full level down onto the LOW moonlit plains. A band of rust-brown rock faces runs along the edge: a lip you can stand on at the top, the rough cliff face below it, and fallen talus boulders at its foot. Where the Highcrag Scarp (north-west) is grey granite stepping HIGH→MID, this is warm rust rock stepping MID→LOW — so both ends of the map now show their height levels breaking in real cliffs, not smooth ramps. It costs nothing and blocks nothing — the rock just dresses the hillside the hero already walks. Left-click the 🪨 Emberwood Scarp marker at the foot for its lore.
- The Emberwood Mistfall (the falls that found its cliff): on the north-east flank of the Emberwood rise (south-east of town) the old Mistfall has been set right. Where it once seemed to hang in mid-air on flat ground, you can now see its source: meltwater spills off the lip of the MID rise-shelf, leaps the cliff edge, and sheets down the rust-rock scarp to a plunge pool on the LOW plains below, throwing up spray and foam. Like the Cragfall on the Highcrag, it now pours genuinely from a higher level to a lower one — so the world's three height levels read as a true landscape, not props on a plane. It costs nothing and blocks nothing; it's a landmark, not a barrier (the rocky cliff that used to block your step there is even gone). Left-click the 💧 Emberwood Mistfall marker on the shelf above the falls for its lore — and remember, water seeks the low ground: follow it down to step off the rise.
- The Highcrag Mistfall (the second falls that found its cliff): on the north face of the Highcrag lower shelf (north-west of town) the last floating waterfall has been set right too. Where the old SW Mistfall once seemed to hang in mid-air on flat ground, you can now see its source: meltwater spills off the lip of the MID shelf, leaps the cliff edge, and sheets down a wet grey-granite scarp to a plunge pool on the LOW plains below, throwing up spray and foam. Like the Cragfall higher on the same crags, it now pours genuinely from a higher level to a lower one — and with it, every waterfall in the world is now anchored to a real cliff, none left hanging on flat ground. It costs nothing and blocks nothing; it's a landmark, not a barrier (the rocky cliff that used to block your step there is gone). Left-click the 💧 Highcrag Mistfall marker on the shelf above the falls for its lore — and remember, water seeks the low ground: trace it down off the crags.
- The Gloomfen Descent (the stair down into the fen): the south has a sunken basin — the teal Gloomfen, where the ground dips below the plains into glowing mire. Until now you just slid down its slope; now its west wall carries a switchback stair of damp fen-stone and tarred timber, zig-zagging DOWN from the LOW moonlit plains into the sub-LOW fen floor and ending right at the glowing pool's edge, lit by a teal lantern-post. Where the Highcrag Stair and Emberwood Ascent climb UP to the high overlooks, this is the first path that deliberately leads you DOWN below the plains — so the world's three height levels now read in both directions. It costs nothing and blocks nothing — the steps just dress the slope the hero already walks. Left-click the 🪜 Gloomfen Descent marker at the rim for its lore. (Keep to the stair's west side — the Grotto Key rests half-sunk in the pool's eastern shallows.)
- The Gloomfen Scarp (where the plains break into the basin): on the east rim of the sunken Gloomfen the moonlit plains don't just dip into the mire — they break off in a cliff. A band of teal-grey fen rock now rings the rim where the LOW plains shear away and drop a full level DOWN into the sub-LOW fen floor: a damp stone lip you can stand on at the top, the rough cliff face below it, and fallen talus boulders at its foot in the bog. Because the Gloomfen is a basin (the ground sinks instead of rising), this scarp faces inward — the opposite of the Highcrag and Emberwood scarps, which face outward off their hills. With it, the map's height levels now break in real cliffs both up and down: HIGH→MID on the Highcrag, MID→LOW on the Emberwood, and LOW→sub-LOW here. It costs nothing and blocks nothing — the rock just dresses the slope the hero already walks; the only dry way down is the Gloomfen Descent stair on the west wall. Left-click the 🪨 Gloomfen Scarp marker on the east approach for its lore.
- The Emberwood Crown Scarp (where the high overlook drops to the rust-wood): the Emberwood crown — the south-east Hunter's Overlook you climb by the Emberwood Ascent — is the highest ground in that corner. Now its south-east face shows it: instead of sloping gently toward the rust-wooded rise below, the crown's crag shears off and steps a full level down from the HIGH overlook onto the MID rust rise. A band of rust-brown rock faces runs along the rim — a lip you can stand on at the very top by the overlook, the rough cliff face below it, and fallen talus boulders at its foot on the rise floor. It matches the Highcrag Scarp's grey-granite HIGH→MID step on the opposite corner, so both high overlooks now visibly tower a full level over the ground around them. It costs nothing and blocks nothing — the rock just dresses the hillside the hero already walks; the only way up is still the Emberwood Ascent trail on the western shoulder. Left-click the 🪨 Emberwood Crown Scarp marker on the rise-side approach for its lore.
- The Highcrag Shelf Scarp (the last cliff, hemmed by falls and river): below the Highcrag Mistfall, the crags' lower shelf makes its south-east face a cliff too. A short band of grey-granite rock faces steps the MID shelf a full level DOWN onto the LOW moonlit plains — a stone lip at the top, the sheer cliff face below it, and fallen talus boulders at its foot. It's a tight little scarp, squeezed between the falls just to the north and the Gloomwater river channel close to the south, so it threads a narrow ledge between them. With it, every one of the world's five hills now breaks into a real cliff at its edge — the height levels read as a true landscape all across the map, not props on a plane. It costs nothing and blocks nothing — the rock just dresses the hillside the hero already walks. Left-click the 🪨 Highcrag Shelf Scarp marker on the low east approach for its lore.
- The Highcrag Shelf Stair (the worn stair to the east): the Highcrag's lower shelf was the last high ground with no way up — walled by the Highcrag Mistfall to the north and the Highcrag Shelf Scarp to the south-east, hemmed between the falls and the river. Now the cliff its own lore spoke of — "only this narrow ledge gives onto the low ground… nothing crosses the scarp but by the worn stair to the east" — has its stair. A switchback of grey-granite steps is cut into the south-east scarp ledge, climbing out of the LOW moonlit plains up the granite face onto the MID shelf top: rail posts on the downhill edge, landing pads at the turns, a signpost at the foot and a stone cairn at the top. With it, every shelf and crown in the world now has a deliberate climb, so the three height levels read everywhere you go. It costs nothing to use (the steps just hug the hillside — a guide, like the other stairs); keep to the ledge between the falls and the river. Left-click the 🪜 Highcrag Shelf Stair marker at the top landing for its lore.
- The Fenwater Beck (the stream that follows the low ground): now that the world's three height levels read in cliffs and stairs, watch what the water does between them. A thin stream leaves the foot of the Highcrag Mistfall, wanders south-east across the moonlit plains — gathering reeds and stones, crossed by a little timber footbridge — and then, where the land tilts, spills DOWN the wall of the sunken Gloomfen to feed its glowing teal pool. It runs from the LOW plains to the sub-LOW fen exactly the way real water would: always seeking the low ground, from the falls above to the basin below. It costs nothing and blocks nothing — the beck just dresses the slope the hero already walks; follow it and it leads you down into the fen. (Keep to the stream — the Grotto Key still rests off to the east in the pool's shallows.) Left-click the 💧 Fenwater Beck marker midway along the stream for its lore.
- The Wayfarer's Wharf (the vessel that opens the world): on the east shore, where the land meets the Sundering Sea, a stone quay juts out over the water on weathered pilings — and tied alongside, a sky-ferry rides at anchor: hull, rail and prow, a little cabin, a tall mast with its sail furled, and a lantern lit against the dusk, with a gangplank run out to the deck. This is the vessel the Frontier Waystone promises — the way you'll one day cross the Sundering Sea to the wider world. But no ferryman casts off yet: the world opens one stage at a time, and this ship sails only once your story has earned the open sea. Left-click the 🚢 Wayfarer's Wharf marker on the quay to read its lore. A classic-RPG "see the vessel, can't sail yet" hook — mark it, and come back when the way is won.
- The Sundergate (the sealed pass that opens the world): at the north brink, where the Wilds run up against the Riven Spires, a great ancient stone gate is built into the mountain wall — two snow-capped towers flanking an opening, a lintel across the top — but it stands barred and sealed: an iron portcullis fills the gap, a faint violet seal-ward glows over it, and scree is heaped against its foot, long shut. A worn flagstone causeway climbs up to it from inside the brink. This is the land road north to the wider world — the pass that pairs with the Wharf's vessel: the world opens one stage at a time, and force won't open this gate — only your story will. Left-click the ⛰ Sundergate marker on the causeway for its lore. Another "see the road out, can't take it yet" hook — mark it, and come back when the seal is yours to break.
- The Sundered Span (the broken bridge that opens the world): over the Sunder Chasm, just west of where the Updraft Feather rests, the wreck of a great old bridge still clings to the canyon. A stone abutment and a length of flagstone deck jut out from the near rim and end in a jagged break; a lonely stub of the far deck clings to the vista side across the gap; and the middle has fallen — broken slabs, rubble and a snapped pier-stump lie far below on the canyon floor, with the surviving piers still rising from the dark. This is why you can't simply walk the chasm: the road that once crossed it is out, and only the Feather's charged leap spans the gap now. It's the bridge that completes the set with the Wharf's vessel and the Sundergate's pass — the world opens one stage at a time, and the span may be raised again only once your story is strong enough. Left-click the 🌉 Sundered Span marker on the south approach for its lore. Another "see it, can't use it yet" hook — mark it, and come back when the way is won.
- The Midward Gate (the road to the Middle Realm): out in the west-central plains, in an open stretch away from the crags, stands a henge of pale standing stones ringing a great stone arch — and hung within the arch, a veil that does not quite open, glimmering faint and teal. This is the Midward Gate, the road to the MIDDLE REALM — the country that lies between the dusk of the human world above and the dark below, "the wide world the old maps name," the layer a traveller may one day cross at will. But the veil sleeps: unlike the Riftgate (which tears straight down into the dark, one-way), the way between worlds wakes only for one who has gone down into the dark, been hunted through it, and found the road back — the moment your one-way descent becomes free two-way travel. Left-click the ✨ Midward Gate marker by the stones for its lore. A "see it, can't cross yet" hook — mark it, and come back once you can walk both ways.
- The Wayreach Beacon (the Middle Realm pressing through): out in the open south-east plains, between town and the Riftgate, a tall watchtower of pale stone leans alone on the moonlit grass — its lower courses solid, its upper courses thinning to translucent glass (half here, half not), its crown-lantern dark, fallen blocks scattered at its foot. This is a relic of the MIDDLE REALM itself — the same in-between country the Midward Gate opens onto — but half-phased through into the human world far from that gate, showing how near the in-between layer truly lies: not one door but a seam the old maps never drew. Its beacon sleeps, and will not kindle for one who has only ever walked the human world; cross down into the dark one-way, be hunted through it, and win the road back, and the Wayreach will burn to guide you between the worlds at will. Left-click the 🗼 Wayreach Beacon marker at its foot for its lore. A second "see it, can't reach yet" Middle-Realm hook, to pair with the Midward Gate.
- The Mossgate (the eastern gate to the first realm): out in the east plains, beyond the Mooncradle Mere, a gateway of lichened stone stands alone on the grass — two pillars, a living-branch lintel, and an arch hung with a faint green haze that won't let you through. This is the MOSSGATE, the overworld threshold of Mossfang Hollow — the first and lowest of the seven realms of the dark. The carnival's plaza portals lied by huddling together: the realms are really seven gates scattered to the seven quarters of the world, and they climb — each gate set deeper and harder than the last, a ladder of challenge you ascend rung by rung. This is the bottom rung, marked with a single notch, and toadstools already push up at its foot like the cathedral-stalks of the fungal hollow waiting beyond. Its veil sleeps until the Warden within is roused. Left-click the 🍃 Mossgate marker for its lore. The first of the realm-gateways — watch the other six rise in the north, west, south and far corners as the world opens.
- The Howling Gate (the northern gate to the second realm): up in the north-central plains, west of the Wayfarer's Road, a barrow-gate of cold grey-violet stone stands alone, its arch opening turned to the north and hung with a faint violet haze that won't let you through. This is the HOWLING GATE, the overworld threshold of the Howling Crypt — the second of the seven realms of the dark, the next rung up the ladder of challenge from the Mossgate. Its waystone is marked with two notches (the second rung), and leaning gravestones and a pale arc of bone already push up at its foot — the barrow-court of the Hollow whispering beyond. Its veil sleeps until the Crypt Howler within is roused. Left-click the ⚰️ Howling Gate marker for its lore. Two of the seven realm-gateways now stand (east, north) — four more will rise in the west, south and far corners as the world opens.
- The Gilded Gate (the western gate to the third realm): out in the west-central plains, between the crags and the open grass, a gateway of gold-veined stone stands alone, its lintel crowned with gilt and its arch opening turned to the west, hung with a faint molten-gold haze that won't let you through. This is the GILDED GATE, the overworld threshold of the Valley of Midas — the third of the seven realms of the dark, a realm of streets of living gold where the covetous gild themselves solid, the next rung up the ladder of challenge from the Howling Gate. Its waystone is marked with three notches (the third rung), and a half-gilded figure and a heap of cooling gold ingots already harden at its foot — the gold-choked valley waiting beyond. Its veil sleeps until Aurelian, the Gilded King, is roused. Left-click the 👑 Gilded Gate marker for its lore. Three of the seven realm-gateways now stand (east, north, west) — four more will rise in the south and far corners as the world opens.
- The Feastgate (the southern gate to the fourth realm): down in the south-central plains, below town where the moonlit grass runs toward the fens, a frost-rimed gate of grey-blue stone stands alone, its arch opening turned to the south and hung with a faint pale-ice haze that won't let you through. This is the FEASTGATE, the overworld threshold of Feastfall — the fourth of the seven realms of the dark, a frozen banquet-hall where the gluttonous gorge until the cold takes them mid-feast, the next rung up the ladder of challenge from the Gilded Gate. Its waystone is marked with four notches (the fourth rung), and a frostbitten feast-table, a guest frozen mid-bite, and a colonnade of icicles already harden at its foot — the black-ice banquet waiting beyond. Its veil sleeps until Throngullet, the Endless Maw, is roused. Left-click the ❄ Feastgate marker for its lore. Four of the seven realm-gateways now stand (east, north, west, south) — three more will rise in the far corners as the world opens.
- The Gloomwater (river crossing + hidden ford): a river runs clean across the deep south of the Wilds, walling off a pale shore strip at the world's last edge — you can't wade the channel, it shoves you back to the bank. A timber bridge at the centre is the obvious crossing. But downstream to the east lies a hidden ford — a faint line of stepping-stones, easy to miss — a secret second way over. Reach the far shore (by either route) to find a guaranteed cache and the 🌊 Gloomwater Shore lore marker washed up there. A soft, natural border (unlike the hard Veil edge) with a Secret-of-Mana-style hidden crossing.
- The Mooncradle Mere (swim-gated island): out in the east Wilds a still lagoon ringed by a sandy coast cradles a lone island with a moonpalm — and a sealed cache. The open water turns back any walker, shoving you to the shoreline. But a glowing 🐚 Tide-Charm rests on the near (west) shore (a teal beam marks it): walk up and claim it to unlock SWIM, then wade straight across to the island and its prize. A "see it, can't reach it yet" secret — the second movement-key after the Sundered Ledge, but here the key is a relic you find, not a skill you cast.
- The Sundering Sea (the eastern ocean edge): past the Mooncradle Mere the east of the world no longer ends at the violet Veil — it opens onto open ocean. A sandy beach lines the inside of the brink (carrying the Mere's shoreline on to the edge), surf breaks in a bright foam line where land meets water, and the sea rolls out to the horizon where distant isles and sea-stacks drift — forever past the surf, no road reaching them on foot. On a north-east headland a lone 🌊 Lighthouse still burns for ships that will never come; left-click it to read the lore of the drowned marches that ring the human world. A diegetic map border (the eastern counterpart to the Veil's Edge) — the coast you glimpsed at the Mere now becomes the true edge of the world.
- The Riven Spires (the northern mountain edge): to the north the world doesn't end at a flat wall either — beyond the brink the land buckles into a mountain range: a wall of snow-capped granite peaks rising in three depth bands (bare foothills hugging the edge, a dominant mid wall, tall distant summits behind) that march off past sight. Only the Sunder Chasm breaks the range, and even that gap was never meant to be walked. Left-click the ⛰ Riven Spires marker at the north-west brink for its lore of the cold lands beyond. A diegetic map border — the northern counterpart to the Sundering Sea (east) and the Veil's Edge (deep side).
- The Smotherwood (the southern & western forest edge): to the south and west the world doesn't end at a flat wall either — beyond each brink the Wilds choke into a deepening forest: a sparse fringe of short pines at the edge that thickens, rank on rank, through a taller mid stand into a tall black back-wall of trees no path has ever opened. The wood visibly thickens to a wall as it runs out past sight. Left-click the 🌲 Smotherwood marker at the west brink for the lore of the forest that hems the human world — the southern/western counterpart to the Sundering Sea (east), the Riven Spires (north), and the Veil's Edge (deep side). With it, every edge of the world is now a believable border rather than an invisible wall.
- The Wardstone Grotto (relic-key cave): in the north-west crags a cave is bored into a dark cliff massif, but its mouth is barred by a glowing violet Wardstone dome — walk into it and you're shoved back out at the ward-ring; the sealed cache inside stays out of reach. The catch: the key is nowhere near the door. Far away in the southern Gloomfen a golden 🗝 Grotto Key lies half-sunk in the mire (a gold beam marks it). Claim it and the ward dissolves across the map, baring the cave and its prize. A classic Zelda "find the key here, the door opens there" secret — the door and key are deliberately far apart to pull you across the world.
- The Sunder Chasm (charged-jump vista): in the far north a wind-carved canyon splits the Wilds — a wide gap, framed by cliff end-walls and a rising updraft, too broad to step. Across it sits a lonely vista shelf (a cairn and a snapping banner) holding a sealed cache you can see but not walk to — try and the brink shoves you back to the south rim. On that rim rests a 🪶 Updraft Feather (a pale beam marks it): claim it to learn the CHARGED JUMP, then the canyon's wind bears you across in a single leap to the vista and its prize. A Zelda "see it, can't reach it yet" gap-crossing — the third found-relic traversal key (after SWIM and the Grotto Key), and the first that crosses a chasm rather than water.
- The Whispering Thicket (hidden-glade forest): in the west Wilds a close-grown stand of old trees rings a hidden glade — push straight at the brush and it turns you back to the treeline. But the wood keeps one winding path in: a faint line of stepping-stones threads a gap in the trees. Find the mouth (a 🌲 Whispering Thicket marker waits at the treeline), follow the path through, and the glade opens onto an old moss shrine with a glowing idol — and a sealed cache. No skill or relic needed: just the classic-RPG forest secret of finding the way in, a clearing tucked inside the wood (Chrono Trigger / Secret of Mana).
- The Cragspire (grapple-up bluff): in the south-west crags a sheer tiered rock bluff rears up, its flat crown crowned with a cairn and a snapping banner — and a sealed cache you can see from below but never walk up to: the sheer face shoves you back at its foot. At the base lies a 🪝 Grappling Claw (an amber beam marks it): claim it to learn the GRAPPLE, then hook the anchor on the crag and haul yourself up to the crown and its prize. A Zelda "see it, can't reach it yet" climb — the fourth and last found-relic traversal key, completing the set after SWIM (Mooncradle Mere), the Grotto Key (Wardstone Grotto) and the CHARGED JUMP (Sunder Chasm); the first that scales a cliff rather than crossing water or a gap.
- The Weeping Hollow (walk-behind-the-falls cavern): in the western crags a waterfall spills down a cliff into a still pool. The sheet of water looks like solid rock — but the falls are a curtain: step THROUGH the water and the cliff opens into a hidden cavern, dry and glittering with glowing crystals, where a sealed cache has been tucked out of sight. No skill or relic needed — just the nerve to walk into the waterfall (a 💧 Weeping Hollow marker waits at the pool). A classic Zelda "walk behind the waterfall" secret — a discoverable place, like the Whispering Thicket, rather than an ability gate.
- The Sundered Ledge (Flash-gated): out on the far south-east corner a stone ledge floats across a bottomless void moat (a black ring with a violet rim). Walking is impossible — the gap throws you back at the edge. Only a dash (Kai's Charge on E, or a Blink) leaps the gap to land on the ledge and claim its own sealed cache; dash back out the same way. This is the first traversal-gated secret — movement skills are keys, not just escapes.
- The Lantern Altar (colour-lock puzzle): in a far north-west corner an altar is ringed by three dead lanterns. Approach and its runes reveal a colour sequence (e.g. violet → amber → teal). Light the lanterns in that order — simply walk up to each — to grind open a sealed vault holding a guaranteed Rare-or-better cache. Touch a lantern out of order and the whole sequence guts out; you start the sequence again. The order is reshuffled every hunt — an AFK-Arena-style traversal puzzle that opens a vault.
- The Hidden Vault (pressure-plate puzzle): in a far north-east corner a vault lies buried flush with the earth — there's no prize in sight, only four rune-plates ringing the spot. Approach and the runes pulse a step sequence; stand on the plates in that order and the slab grinds up out of the ground, revealing a guaranteed Rare-or-better cache beside it. Press a plate out of order and the runes die — start the sequence again. Unlike the lantern altar you walk near, here you must step on each plate, and the vault stays hidden until solved. The order is reshuffled every hunt.
- The Blood Moon (survive the swarm): every 30 minutes spent in the Wilds the sky turns blood-red and a swarm converges on you from every direction for about 22 seconds. Each creature is weak (a fraction of normal HP and damage) but the horde is nearly as fast as you are — you can't outrun it on foot, so keep moving and thin it with area skills rather than trading blows. Outlast the moon and it sets, leaving a bonus item, gold and Slaying XP behind (and the Blood Survivor achievement on your first).
- The Coffer Wraith (treasure-goblin): each hunt a small gold-sacked treasure-goblin bolts loose somewhere in the Wilds, marked by a gold pillar of light. It never attacks — it only flees, a little faster than you, so a plain chase won't land it: dash (Kai's Charge) or strike it with ranged bolts / skills. Catch (kill) it and it drops a guaranteed Rare-or-better cache where it falls; let it outrun an escape timer and it slips through a rift with its hoard — lost for the run. A Diablo-goblin chase that rewards mobility.
- Realm hazards (the land itself fights you): each of the four Sin-Realms carries its own environmental hazard, active once you step off the safe entry pad — danger that bleeds you between fights, dodged or mitigated a different way in each. Valley of Midas (Greed) — gilded snares erupt at your heels, slowing and biting you. Feastfall (Gluttony) — a hunger-storm that feeds on the still: it bites hardest when you stand put, so keep moving (your nearby pet can be caught too). Isle of Dominus (Power) — a static field where lightning telegraphs at your feet (a yellow ring) before it strikes, so step out in time. Enamora (Lust) — a beguiling rose-light charms you off your path and pricks you with thorns. Hazards are pure danger (not loot), so they apply even to the Blighted.
- Mossfang Hollow — the Fungal Cathedral (a realm with its own shape): the realms below the Rift are no longer interchangeable recolored boxes — each is growing its own geography. The first you descend into, Mossfang Hollow (the tier-1 Leaf realm), is now a fungal cathedral: a giant cathedral toadstool looms over a clearing ringed with smaller mushrooms, old roots arch overhead like the ribs of a buried thing, and a raised mossy hummock breaks the flat floor — the world already feeling "the wrong size," exactly as the crossing warns. Walk into the grove and left-click the 🍄 Fungal Cathedral marker for its lore: the lowest rung of the descent, where the Hunt that hunts you first picks up your scent. (Purely scenery — it changes the realm's silhouette, not where you can walk.)
- Howling Crypt — the Hollow Barrow (a realm with its own shape): the second realm beneath the Rift, the tier-2 Phantom realm, no longer reads like a recolored box either — Howling Crypt is now a haunted barrow. A sunken cracked-stone floor dips at its heart, a lone mausoleum looms with a dark mouth yawning open (the dominant silhouette), a ring of leaning gravestone slabs tilts around the clearing, bone-pale ribs arch overhead, and pale phantom wisps drift in the dark. Walk in and left-click the ⚰️ Hollow Barrow marker for its lore: the rung where the Hollow Court's whispers seep up through the slabs and the Hunt that hunts you grows teeth — linger by the tombs and the whispers learn your name. (Purely scenery — it changes the realm's silhouette, not where you can walk.)
- Valley of Midas — the Gilded Reliquary (a realm with its own shape): the third realm beneath the Rift, the tier-3 Fire/Greed realm, sheds the recolored-box look too — Valley of Midas is now a molten gold-hoard. A sunken molten basin glows at its heart with a lava lake for a floor, a towering gilded colossus — Aurelian, the Gilded King — looms over it as the dominant silhouette, a ring of covetous souls hardened into gilded statues stands frozen mid-grasp, lava cracks radiate across the stone, gold-hoard piles heap at the edge, and ember motes rise off the molten basin. Walk in and left-click the 👑 Gilded Reliquary marker for its lore: the rung where the covetous gild themselves solid and the Hunt that hunts you wears a crown — reach for the gold and the gold reaches back. (Purely scenery — it changes the realm's silhouette, not where you can walk.)
- Feastfall — the Frozen Feast (a realm with its own shape): the fourth realm beneath the Rift, the tier-4 Ice/Gluttony realm, drops the recolored-box look as well — Feastfall is now a glacial banquet hall. A sunken black-ice floor spreads at its heart, The Endless Maw — Throngullet, a towering glacial maw of frozen fangs — yawns over it as the dominant silhouette, a long frostbitten feast table heaped with frozen platters runs down the centre, a ring of gorged guests frozen mid-bite into ice statues sits around it, an icicle colonnade rings the hall, frost-cracks radiate across the floor, and snow motes drift over the table. Walk in and left-click the ❄️ Frozen Feast marker for its lore: the rung where the gorged devour and are devoured in turn at a table never cleared, and the Hunt that hunts you keeps an empty seat — feast, and you become the feast. (Purely scenery — it changes the realm's silhouette, not where you can walk.)
- Isle of Dominus — the Storm Throne (a realm with its own shape): the fifth realm beneath the Rift, the tier-5 Lightning/Pride realm, leaves the recolored-box look behind too — Isle of Dominus is now a storm-wracked throne-court. A storm-scarred floor spreads at its heart, The Storm Throne — Vael, the Crowned Tyrant, a towering tiered throne crag crowned with arc-spires beneath a crackling lightning arc — looms over it as the dominant silhouette, a ring of tesla spires arcs lightning around the dais, shattered colossus statues of dethroned pretenders lean broken across the court, lightning-scars radiate across the stone, and charged motes drift in the static air. Walk in and left-click the ⚡ Storm Throne marker for its lore: the rung where the proud climb over one another to seize a throne that brands all who sit it, and the Hunt that hunts you rides in on the thunder — take the throne, and the throne takes you. (Purely scenery — it changes the realm's silhouette, not where you can walk.)
- Enamora — the Beguiling Rose (a realm with its own shape): the sixth realm beneath the Rift, the tier-6 Earth/Lust realm, sheds the recolored-box look too — Enamora is now an overgrown rose-garden bower. A verdant terraced floor spreads at its heart, The Beguiling Rose — Seraphel, a vine-wound colossus crowned with a great impossible bloom — looms over it as the dominant silhouette, a ring of thorn-bramble spires tipped with blossom rings the bower, a ring of petrified lovers frozen mid-embrace leans toward the bloom, root and vine cracks radiate across the floor, and petal motes drift on the air. Walk in and left-click the 🌹 Beguiling Rose marker for its lore: the rung where a single impossible bloom lures every wanderer off the path with the promise of love, and the Hunt that hunts you comes wearing the face you most long for — reach for the rose, and the rose keeps you. (Purely scenery — it changes the realm's silhouette, not where you can walk.)
- The Abyssal Vault — the Hollow King's Seat (the last realm with its own shape): the seventh and deepest realm beneath the Rift, the tier-7 Mystic finale, is the last to shed the recolored-box look — and with it, every realm now has its own geography. The Abyssal Vault is a sealed arcane sanctum of warped, non-euclidean stone. The Vault Warden — a colossal eldritch sentinel with the Etherheart pulsing in its chest and a crown of sigil-horns — looms as the dominant silhouette, sigil-rings hang frozen in the air above the seat, a void-rift altar cracks open to the abyss, a ring of arcane sealing obelisks binds the vault, and void-thralls kneel bound to the throne. Walk in and left-click the 🔮 Abyssal Vault marker for its lore: where the campaign ends or you do, and the Hunt that hunts you closes its jaws — the dark that stalked you down every floor waits at the bottom, and there is nowhere deeper to flee. (Purely scenery — it changes the realm's silhouette, not where you can walk.)
- Waypoints & vistas (first-visit unlock): the first time you reach a realm you discover its waypoint — the fog peels back to reveal the nearby map and you collect a small finder's reward (gold + Slaying XP) that scales with the realm's tier. The waypoint then lights up on the 🗺 world map (M), and from Emberhollow you can click a discovered waypoint to teleport to it. Deeper realms pay a bigger first-visit bonus, so pushing into new ground is its own reward.
- The Atlas (map progress screen): beneath the 🗺 world map (M) sits a live Atlas — a four-stat summary of how this hunt is going: the percentage of the Veil you've explored (the fog you've cleared), the memories you've reclaimed for the codex (n / total), the waypoints you've discovered (n / total), and the hidden caches you've cracked open this run (plus how many remain sealed in the fog). A glance shows what's still out there to find — explored %, collectibles, waypoints and caches in one place.
🚪 Getting Started
Run start_game.bat (serves the game at http://localhost:8000 — required so 3D models and the monster roster can load), then open the game in your browser. You'll land on the login screen: enter a summoner name (saved in your browser) and press Enter the Rift. Your name and all progression — including hero mastery — live in browser localStorage; nothing is uploaded anywhere.

🐲 Champions & Mastery
Every champion is a real monster from the Ethermon roster with one or two elemental types. Its primary type decides its Q/W/E skill kit. Champions come from evolution chains, so your hero can evolve into stronger forms mid-match.

★ Hero Mastery
The more you play a hero, the marginally better you get with it — like a personal rune page that grows with practice:
- You earn 1 mastery point per 15 seconds played on a hero, plus a bonus for finishing a match (+10 win / +4 loss).
- Mastery level = capped curve up to Lv 10 (Lv 10 needs 1,000 points).
- Each level grants +0.5% HP and attack on that hero — hard-capped at +5% so it stays flavor, never pay-to-win-by-grinding.
- Mastery is shown on every champion card and stored in your browser (localStorage).
🎮 Controls
| Input | Action |
|---|---|
| Right-click | Move hero / attack target — or command selected units |
| Q W E | Aim a skill (preview shown) → left-click to cast; right-click / Esc cancels |
| F | Pet support heal — restores 35% of your HP and 30% to nearby friendly units (25s cooldown) |
| R | SUPER skill — your hero's ultimate, themed by element (90s cooldown, 100 mana) |
| D | Flash — leap forward in the direction you're moving (2 min cooldown) |
| G | Potion — restore 25% HP (2 min cooldown) |
| T | Recall — stand still 4s to teleport to your fountain (damage or moving cancels) |
| S / Esc | Stop the hero mid-path / cancel an aimed skill before it casts |
| B | Open / close the Item Shop |
| Left-drag | Box-select your peons & soldiers |
| C / V | Selected peons: chop wood / mine gold |
| F / H / S | Selected units: follow / hold position / stop |
| Arrows / screen edges / minimap | Pan camera (LoL style) |
| Space | Recenter camera on hero |
| Mouse wheel | Zoom |
✨ Skills
Skills use modern aim-then-cast targeting: press the key, see a live preview (ring for area, line for direction), click to cast. Clicking near the enemy hero snaps the cast onto them. Each of the 17 elements maps to a kit built from six archetypes:
| Archetype | What it does |
|---|---|
| Nova | Lobbed blast that erupts for area damage at the cursor |
| Line | Piercing shot in a straight line |
| Ring | Ground slam around you — damages and slows |
| Buff | Attack-speed surge for a few seconds |
| Dash | Quick reposition toward the cursor |
| Blink | Instant teleport to the target point |
Skills cost mana and scale with hero level (XP from creeps, kills, structures and passive trickle).
💰 Economy
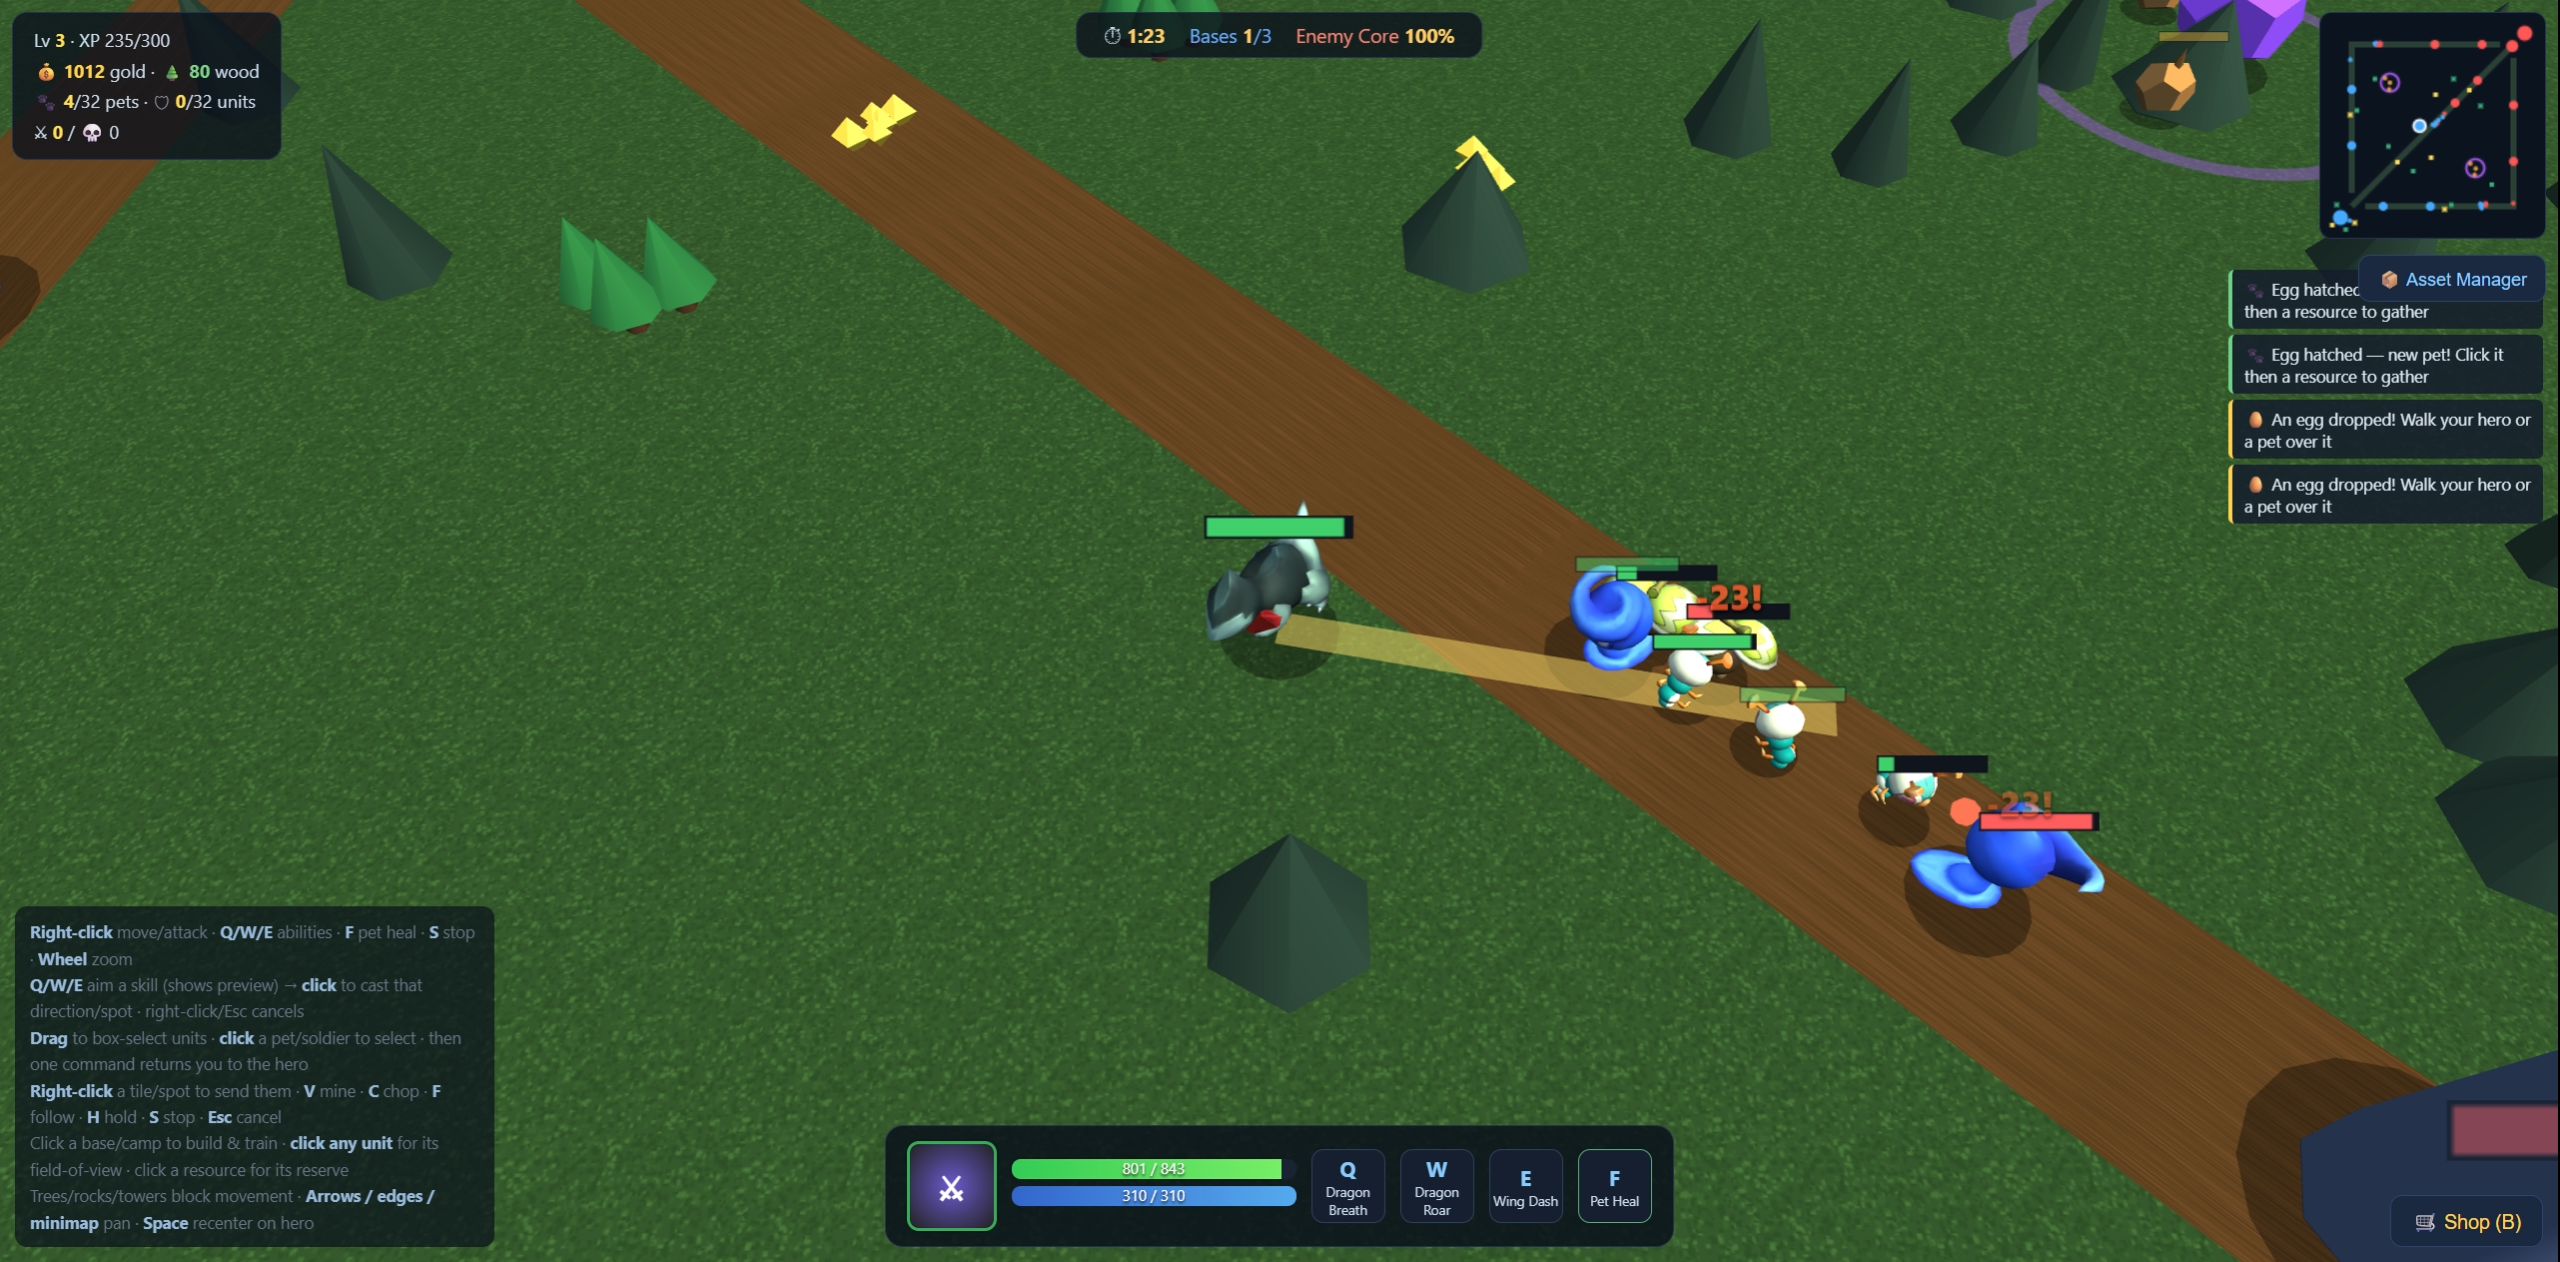
Two resources: gold and wood. Your hero earns gold from kills; peons (pet monsters) gather both — StarCraft style. Select a peon, right-click a tree or gold vein, and it hauls loads back to the nearest base and keeps going. Trees are solid until chopped.
- Killing enemies and wilds can drop eggs — walk your hero or a pet over one to hatch a free peon.
- Gold also gates the Item Shop, training units, buildings and evolution — spend wisely.
- Caps: 32 peons, 32 soldiers.
🏰 Building
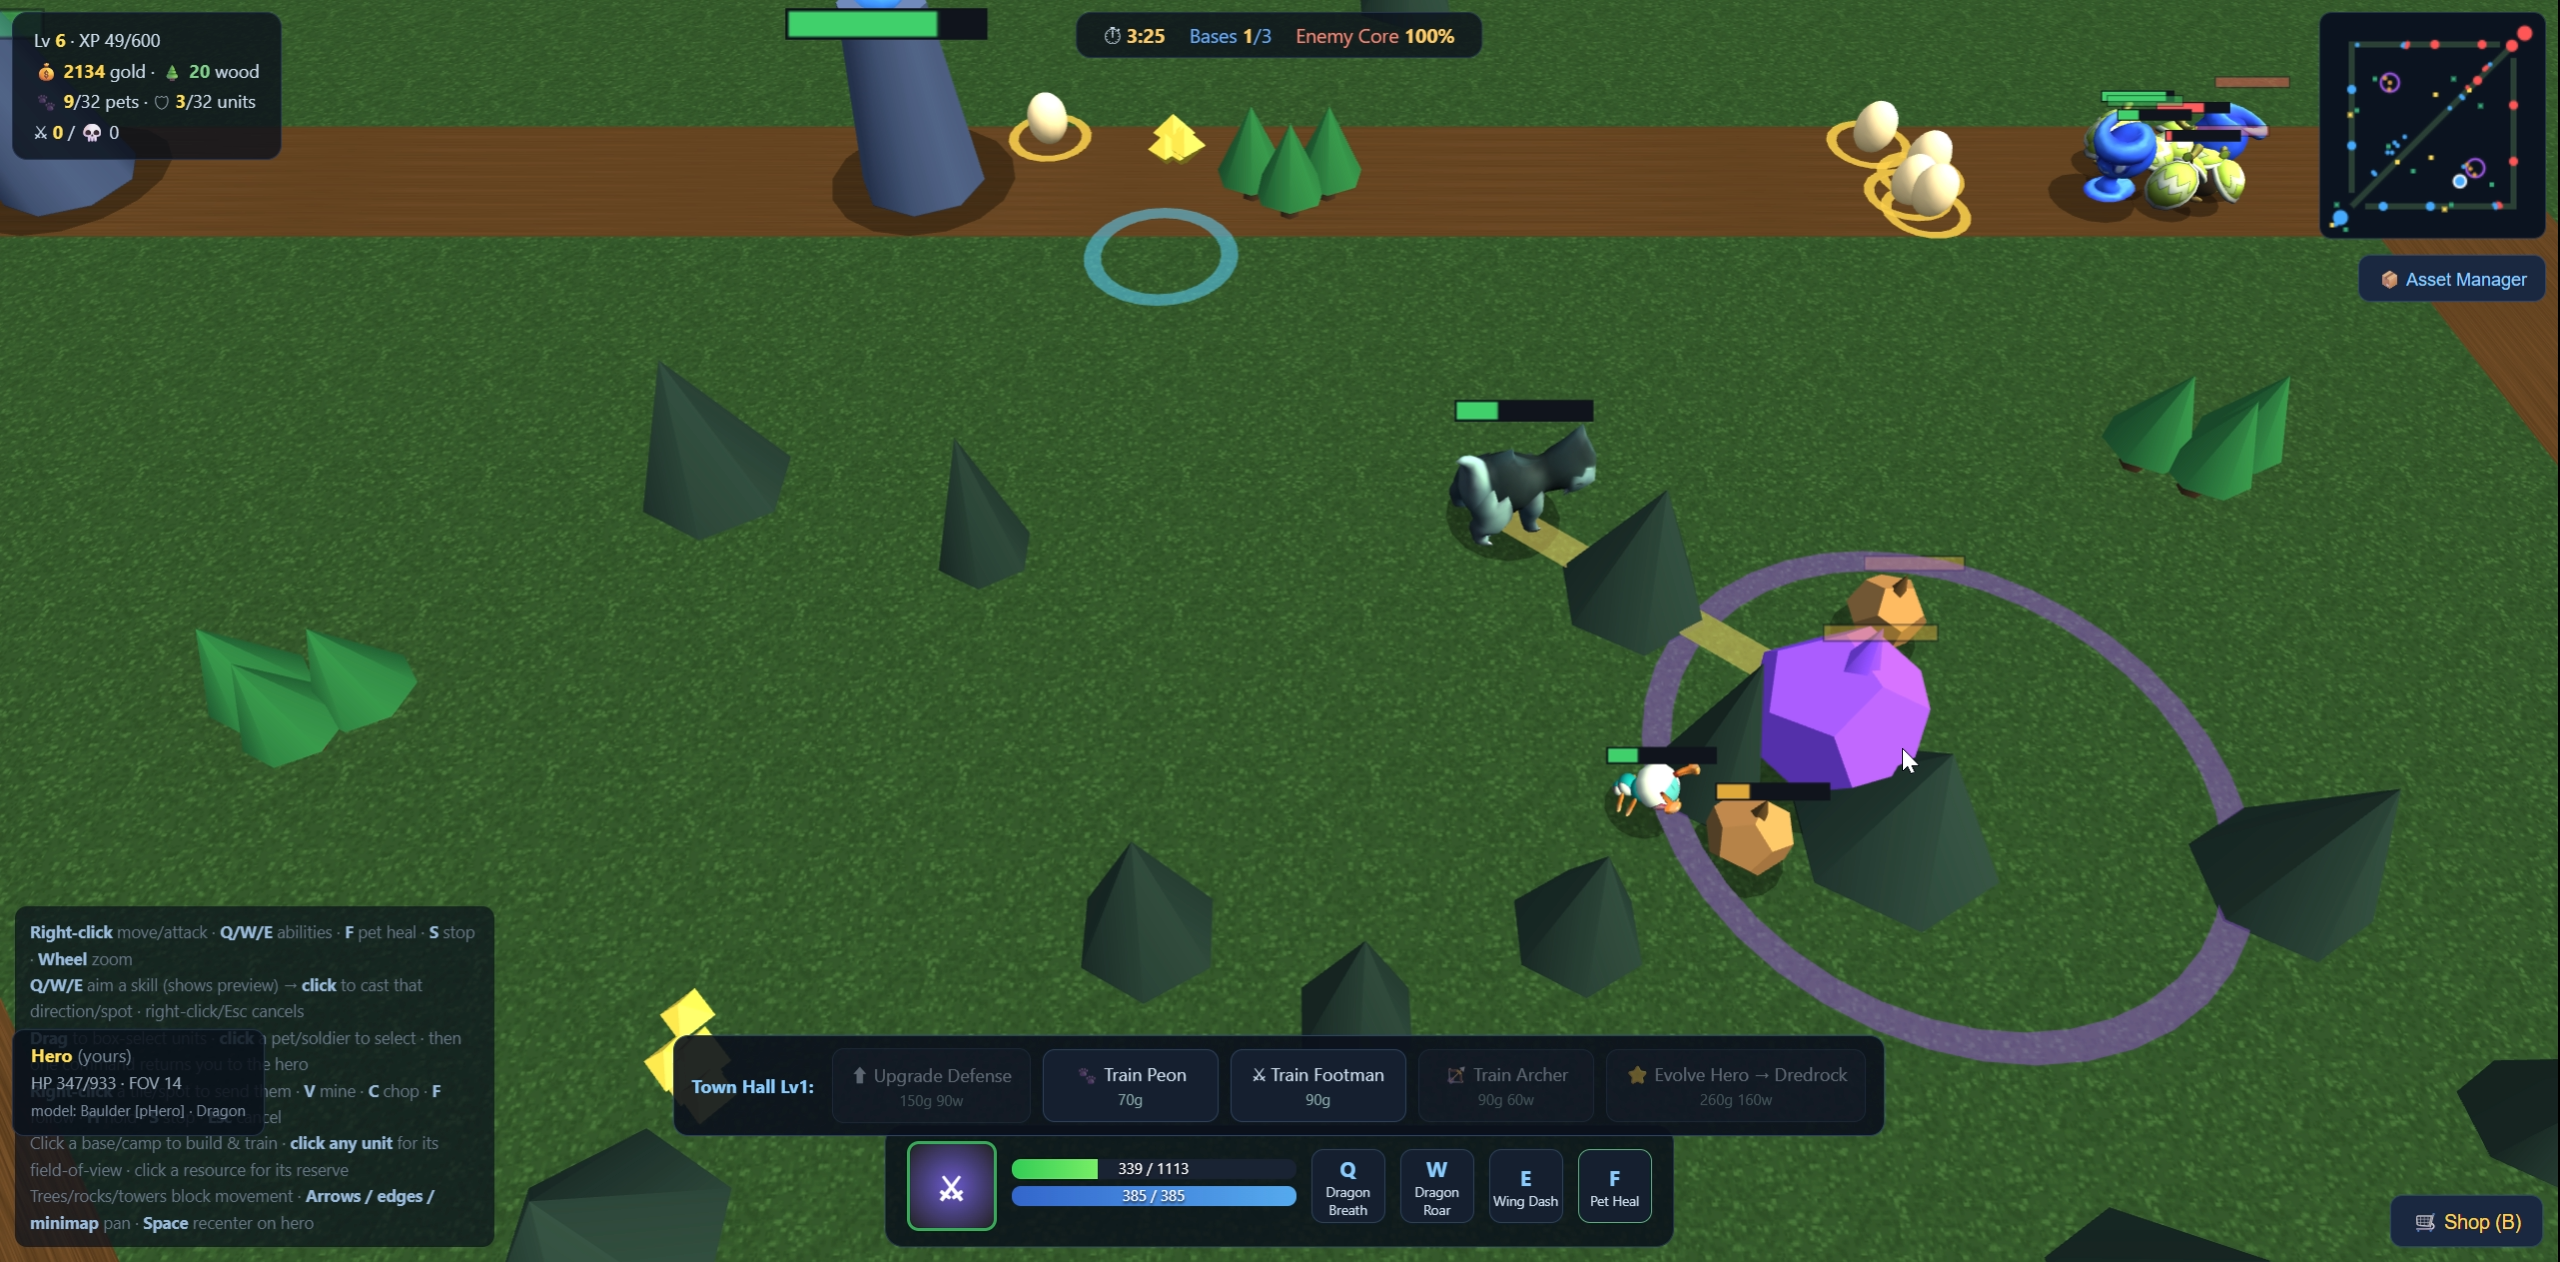
Glowing rings on the map are build slots. Click one to build a Tower (auto-attacks) or an Expansion Base (up to 3 bases total). Expansion slots near gold are guarded by wild camps — clear the guards to unlock them. Click a base or your town hall for its menu: upgrade defense, train peons / footmen / archers, and evolve your hero.
⚔ Units & Evolution
| Unit | Role |
|---|---|
| Minions | Auto-spawn in waves down all three lanes every 30s (plus one heavy per lane) |
| Footman | Trained melee bruiser — marches the mid lane or follows your commands |
| Archer | Trained ranged attacker — long field of view |
| Peon | Gatherer; will defend itself |
| Wilds | Neutral camp guards — gold, XP and egg chances |
Evolution: units from an evolution chain can evolve to Form 2 (bigger model, +50% HP, +40% damage); heroes can reach a Form 3 power spike. Evolve buttons appear in the unit panel and town-hall menu — costs gold + wood.
🛒 Item Shop & Hero Upgrades
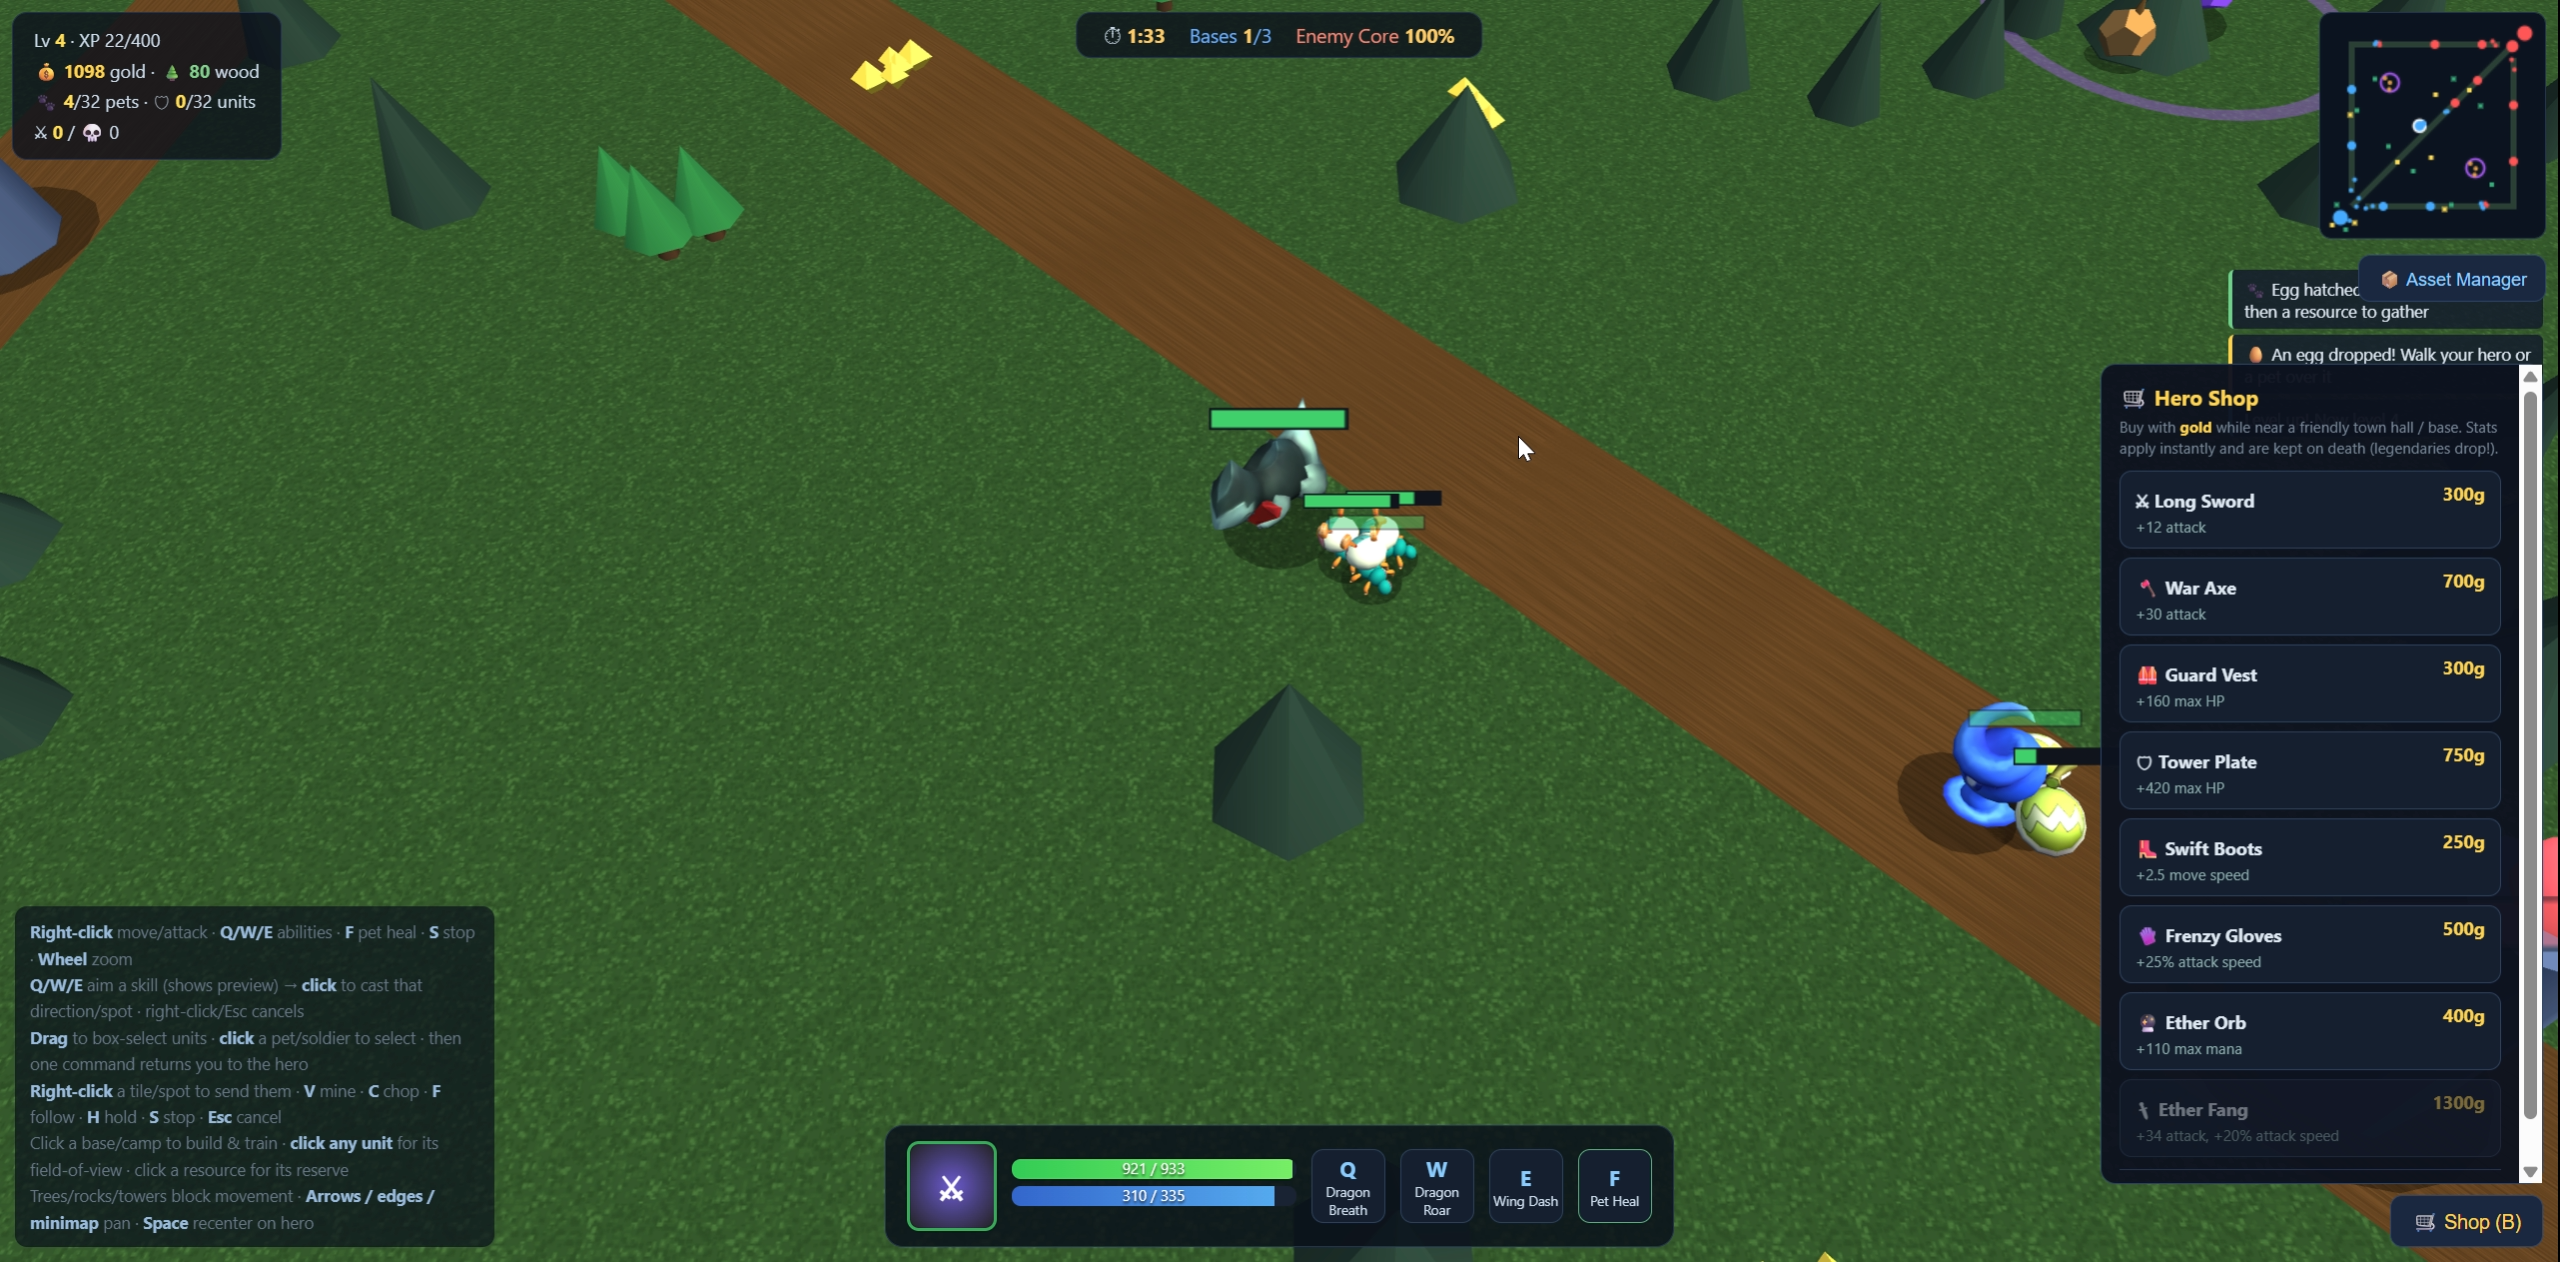
Modern-MOBA itemization: press B (or the 🛒 button) to open the shop. You must be near a friendly town hall or base to buy, and everything costs gold. Up to 6 items; their stats apply instantly and persist through death.
| Item | Cost | Effect |
|---|---|---|
| ⚔ Long Sword | 300g | +12 attack |
| 🦺 Guard Vest | 300g | +160 max HP |
| 👢 Swift Boots | 250g | +2.5 move speed |
| 🔮 Ether Orb | 400g | +110 max mana |
| 🧤 Frenzy Gloves | 500g | +25% attack speed |
| 🪓 War Axe | 700g | +30 attack |
| 🛡 Tower Plate | 750g | +420 max HP |
| 🗡 Ether Fang | 1300g | +34 attack, +20% attack speed |
The enemy hero "shops" on a timer too, so itemization stays balanced for both sides.
👑 Boss Zones & Legendary Loot
Two boss lairs sit in the previously-unused jungle quadrants (purple rings on the map and minimap) — and they hold the high ground: each lair crowns a hill, and climbing or descending the ramps slows all units by up to ~45% (Dota-style high-ground pressure, but as a movement cost). Pale circles on the minimap mark the hills. Each lair holds a powerful boss (2,400 HP) flanked by elite guards:
| Lair | Boss drop | Stats |
|---|---|---|
| North-west jungle | 🔥 Inferno Edge (legendary weapon) | +40 attack, +20% attack speed |
| South-east jungle | 💠 Aegis of Ether (legendary armor) | +520 max HP, 15% damage reduction |
- Legendaries auto-equip when any hero walks over them — first come, first served.
- When the carrying hero dies, the legendary drops where they fell — the enemy hero can steal it. High risk, high reward.
- Bosses respawn ~150s after being slain. Boss kills also grant big gold and XP.

🌪 Elemental Type Chart
Pokémon-style effectiveness on every attack: ×1.5 when the attacker's type is strong against the defender, ×0.7 when resisted. Super-effective hits show big orange damage numbers. Structures are neutral. The full chart is printed on the champion-select screen and lives in mon_lineage.json (17 types: Fire, Water, Leaf, Lightning, Earth, Ice, Combat, Toxin, Telepath, Insect, Rock, Phantom, Dragon, Iron, Flyer, Mystic, Neutral).
❤️ Combat, Healing & Respawns
- Fountain: a glowing safe pad behind each town hall — heroes spawn and respawn there and heal back to full in seconds (14% HP/s). T recalls you home from anywhere.
- Town-hall healing: standing near any friendly town hall or expansion base regenerates 70 HP + 25 mana per second — retreat to any base, not just home.
- Map paths: rock ridges divide the jungle and seal the outer border — there are distinct lanes and jungle gaps, and you can't sneak around towers along the map edge. Towers hit hard (85 dmg, range 21): walking through one costs at least a couple of hits.
- Pet heal: F — your companion restores 35% of your HP (25s cooldown).
- Respawn: hero death = timer (6s + 2s per level) shown on your portrait, then you respawn at your base. Carried legendaries drop on death.
- Damage numbers: orange = super effective, grey = resisted, white = normal.
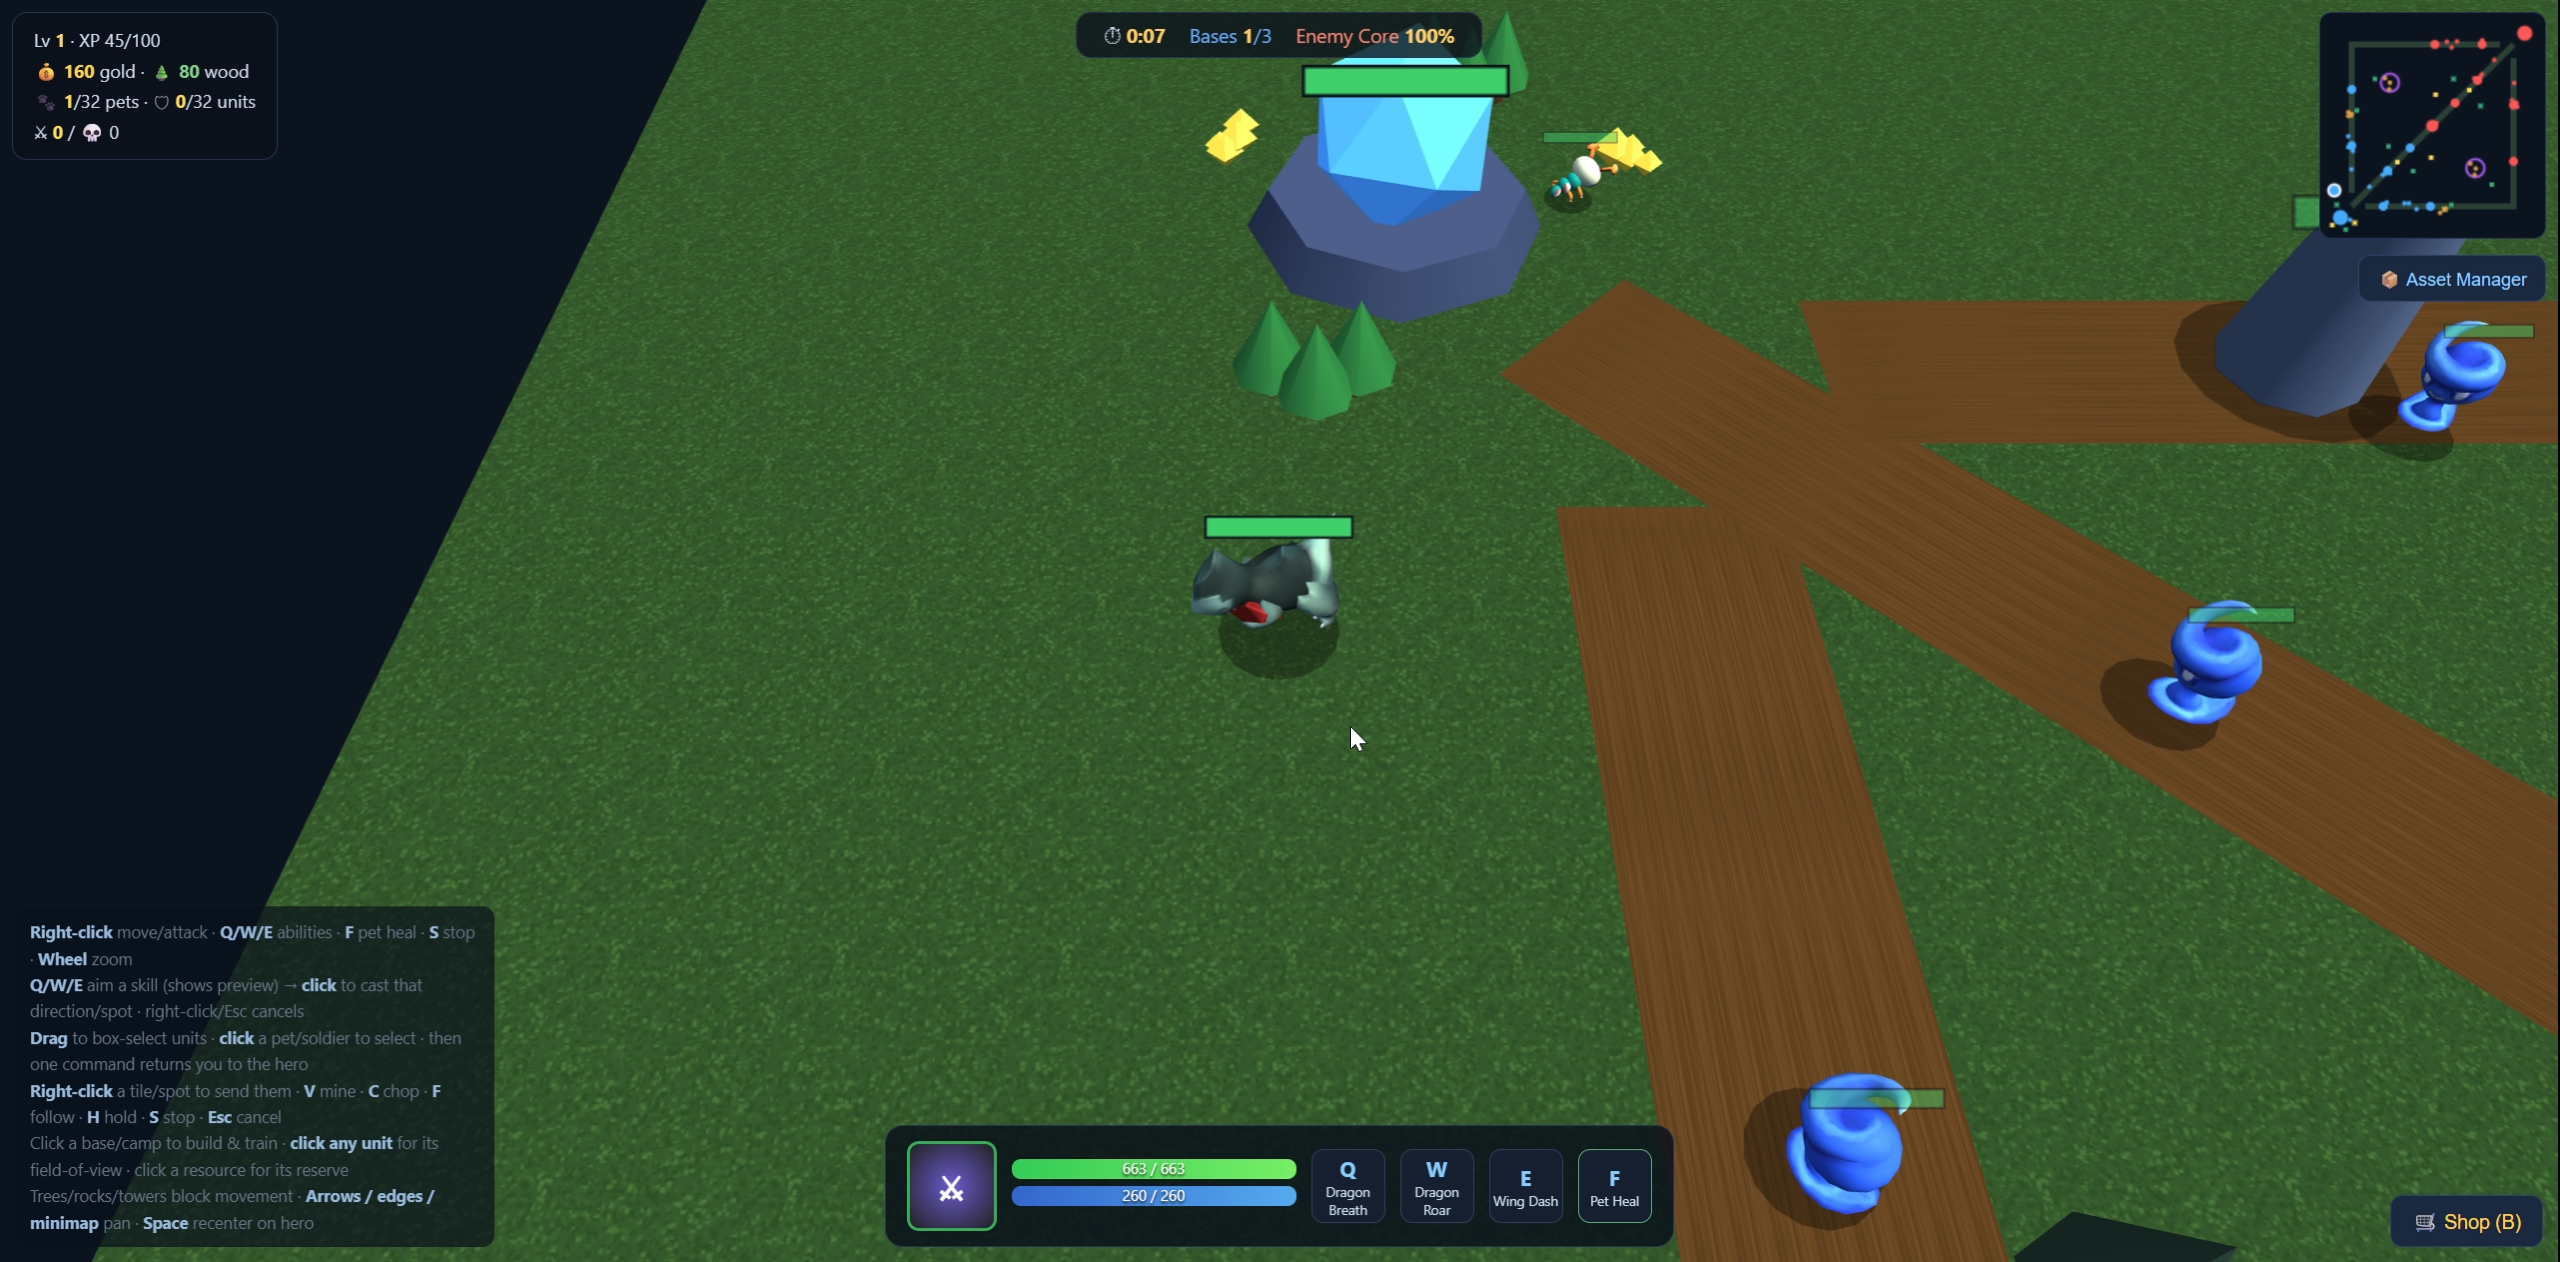
🗺 HUD & Minimap
Bottom: portrait (respawn timer), HP/mana bars, Q/W/E/F skill buttons with cooldowns. Top: game clock, base count, enemy core HP. Left: level, XP, resources, unit counts, K/D. Right: minimap — lanes, resources, all units, purple rings for boss lairs and gold diamonds for dropped legendaries. Click the minimap to jump the camera.